Last updated on February 10th, 2025 by Kenneth Ojeisekhoba
OXERBLOG > BLOG > HOW TO CREATE A WEBSITE IN NIGERIA
Disclosure: Oxerblog relies on the support of its readers through referral links. I may earn a small commission for some of these links, at no additional cost to you.

Doing business online is increasingly becoming the new normal in Nigeria and around the world.
The COVID-19 pandemic made us more aware of the numerous opportunities for business, businesses, and making money online.
Today, having a website is essential if you want to be taken seriously in the business world.
Statistics indicate that your website is likely the first place new customers visit to learn about your brand.
In 2023, 39.3% of Nigeria’s 103 million internet users conducted brand research on company websites, while 33.5% reported discovering new brands through these sites (Datareportal).


So, creating a website for your brand or product is a smart business decision, regardless of your company’s size or industry.
A well-designed business website can enhance your brand’s visibility, attract a wider audience, increase sales, and ultimately improve your bottom line.
The good news is that you can easily build an beautiful website that can go live in just a few minutes, even if it’s your first time.
With the tools available today, you don’t need to hire an expensive web developer or a highly skilled designer.
In this guide, you’ll learn:
✓ How to make an attractive, budget-friendly website and get it online in 9 simple steps.
✓ How to optimize your site for higher search rankings and better user engagement.
✓ How to promote your website (and brand) to your target audience.
With that, here is an overview of what this guide will cover:
Table of Contents
▪ First, The Startup Tools Needed for Your Website Setup
▪ Then, The 9 Steps to Create a Lovely Website
▸ 1. Choose a Brandable Name As Your Domain
▸ 2. Select a Good Web Hosting Provider
▸ 3. Install the Latest WordPress Version
▸ 4. Choose a Lovely Theme as Your Site’s Design
▸ 5. Publish the Basic Pages Your Site Needs
▸ 6 Add a Blog Section to Your Website
▸ 7. Add Essential Features with Plugins
▸ 8. Make Your Site More Prominent in Search Results
▸ 9. Market Your Brand to Your Audience
▪ Frequently Asked Questions (FAQs)
Now, let’s set the ball rolling.
First, The Startup Tools Needed for Your Website Setup
Building a website in Nigeria is the same as creating one anywhere else.
You will need 5 essential tools to establish a professional website. They include:
1). A domain name.
A domain name will serve as your website’s name and address on the Internet. For example, google.com, oxerblog.com.
This is what people will use to identify and access your website from anywhere in the world.
Ideally, a domain name should reflect your business name if the website is for your company.
However, it’s important to choose a domain name that is brandable, easy to spell, and memorable.
2). A web hosting plan.
A web hosting plan is essential for your website, as it serves as its home on the internet.
Without a web hosting plan, your site cannot go live or be accessible to users.
It’s important to select a reliable and affordable hosting plan from a reputable web host for your website.
3). Content management system (CMS).
A content management system (CMS) provides a platform for building a robust website and creating great content without learning coding.
There are thousands of CMS options available, but it’s important to choose one that fits your specific needs.
For this guide, I will use WordPress, the most popular CMS in the world. It currently powers more than 43% of all websites on the Internet.
4). A beautiful web design.
A web design provides the foundation for creating a customized look and layout for your website.
There are so many lovely WordPress themes available today. Some are free while others are paid.
However, select a responsive theme that optimizes user experience across all devices and screen sizes.
5). Plugins.
Plugins enable you to add the various features and functionality your website requires.
There are 14 essential plugins that every new website needs to operate smoothly (more on this later).
Now that you’re aware of the 5 tools necessary for creating a website, let’s start the building process.
Create a New Website in Nigeria (in 9 Simple Steps)
Step 1: Choose a Brandable Name as Your Domain
Choosing a domain name for your website is one of the most important decisions you’ll make when building one.
Unlike human names, each domain name combined with its extension must be unique—no two websites can share the same full domain name.
For instance, this website’s domain name is oxerblog.com:
“oxerblog” − domain name, and “.com” − domain extension.
There are no other sites on the internet with that exact name.
You may come across entirely different websites that share the same domain name but have different extensions.
For instance, WordPress.org and WordPress.com are two distinct websites.
The domain extension differentiates the two, and that is perfectly legitimate.
Nevertheless, it’s essential to choose a unique domain name to avoid being seen as a copycat.
Brainstorming a name that stands out can be quite challenging, especially with domain name speculators buying and selling popular names.
With a bit of creativity, however, you can still create a catchy, universal, search-friendly, and memorable domain name.
It should be easy for anyone, regardless of their background, to remember, pronounce, and type your domain into their browsers.
Additionally, the shorter the domain name, the better.
Again, if the website is for your business, consider using your company’s name as your domain.
For more details, please see my guide on choosing a good domain name for your website.
Once you have a few ideas, it’s a good idea to use a reliable domain name checker such as Bluehost’s, to see which names are available.

Their domain name checker includes an AI feature that generates amazing domain name ideas.
However, it only allows the generation of names with popular extensions such as “.com,” “.org,” “.net,” and others.
The “.com” extension remains the most popular top-level domain (TLD) in the world.
According to Statista, as of December 2023, 46% of all domains worldwide end with “.com”.

With that said, the “.ng” domain extension is becoming increasingly popular in Nigeria.
However, if you want to register a domain name with a “.ng” extension, you cannot do so through Bluehost.
Instead, you will have to purchase your domain from one of the domain registrars based in Nigeria.
Many people prefer the “.com” extension because it is widely recognized globally. Users often assume that all domain names end with “.com” and instinctively type it in when searching for a website.
Therefore, if you’re running a local business, I recommend thinking globally.
Some of your customers may come from other parts of the world, and individuals often default to typing “.com” when entering a website address.
Moreover, the choice of domain name extension can influence your search engine rankings.
According to Google, country-code top-level domain (ccTLDs) like “.ng” or “.com.ng” signal to search engines and users that your brand or product is targeted to a specific region.
Ideally, you want a domain that won’t negatively impact your global search rankings or make it difficult for users to access your website.
Once you find a domain name that you like and is available, make sure to register it quickly with a reliable domain name registrar before someone else claims it.
The typical price range for a domain name falls between $6 (around ₦6,000) and $20 (approximately ₦20,000) per year for generic top-level domains (gTLDs) such as “.com,” “.org,” “.net,” and so on.
Note: I have pegged the exchange rate at ₦1,000 to the dollar. Due to the declining value of the naira, it may be much higher than that.
If you want to register a domain name with any of the popular extensions, you can do so with various domain registrars, both in Nigeria and internationally.
The cost of domain names with popular extensions is generally similar across different registrars.
A “.ng” extension typically costs around ₦8,000, while a “.com.ng” extension is priced at approximately ₦3,000. However, again, “.ng” and “.com.ng” domains can usually only be registered with registrars that are primarily based in Nigeria.
IMPORTANT: For security reasons, choose a trusted and experienced domain name registrar. Every year, hundreds of thousands of domain names get stolen.
If you’re ready to start your website, hold on; I’ll guide you on how to register a “.com” (or another popular extension) for free on Bluehost.
Don’t be discouraged if the names you come up with are already taken. You can put off the search for a while while you brainstorm new ideas.
Fortunately, you can continue building your site without a domain. Don’t worry; I’ll show you how in the next step.
Step 2: Select a Good Web Host
Choosing a web host is the next crucial step in setting up your website.
Every website requires a web host.
As the name implies, web hosts specialize in hosting websites on the Internet, among other things.
In a way, web hosting companies are like online real estate investors; they invest heavily in building various types of servers to accommodate websites.
Without them, it would be extremely costly for individual site owners to build and maintain a “home” for their websites.
Fortunately, we can now rent space for our websites at affordable prices.
Your new website only needs a small amount of space to get started. However, it is essential that the hosting is secure from hackers and accessible to users 24/7.
That’s why I highly recommend Bluehost.

Bluehost is one of the best web hosting providers in the world, and it is very beginner-friendly.
It is a reputable web host known for its 99.99% uptime reliability and excellent customer service.
Bluehost is one of the top hosting companies recommended by WordPress.org.
They are an excellent choice for web hosting, whether you’re using WordPress or another website builder.
Founded in 2003, they check all the right boxes for hosting needs.
Their hosting packages are often heavily discounted for the first term.
They also offer specialized hosting for WordPress, which includes automatic installation and updates, along with a free domain for the first year, among other benefits.

On the Bluehost website, click on the golden View Plans to view their WordPress hosting plans.

For beginners, their Basic plan is a good place to get started.
Right now, they’re offering all our readers a special price.
The 1-year package normally costs $11.99 (i.e. about ₦12,000) per month, but you can get it now for $2.95 (i.e. about ₦3,000) − a 75% savings.
That amounts to $35.40 (i.e. approx. ₦36,000) a year.
While the 3-year package costs $4.95 (i.e. about ₦5,000) a month; that is 50% off.

So the total hosting price will cost $178.20 (i.e. about ₦179,000) for 3 years.
Their 3-year package is the best price in the long run if you can afford it. You won’t be reverting to the normal price of $9.99 until after 3 years.
That said, choose a plan that won’t overburden you financially, especially if you’re just starting out.
Because of how sure they are about their services, they’ve offered a 30-day money-back guarantee.
Feel free to use my link to get this amazing offer.
On their website’s landing page, click the golden View Plans button to begin the purchase process.
This will bring you to their plan table for WordPress sites and stores.
Here, you’ll find 4 different hosting package – Basic, Choice Plus, Online Store, and Pro.
Their Basic option is a great choice for beginners. And you can start up to 10 websites on this plan.
Click on the blue Select button under Basic to continue.
This will bring up the screen where you’ll set up your domain with any of these 3 options:

1. I want to use a domain I already own
2. Register a new domain
3. Choose domain later
✓ If you’ve registered one previously, check the box before I want to use a domain I already own, enter the name, and click Use This Domain Name.
✓ If you want to create a new one, enter it in Register a new domain field, and click Search For Domain.
(By default, Bluehost will add the dotcom extension to your domain. So, select also your preferred domain name extension).
✓ If you haven’t yet found a name you like, simply click on Choose Domain Later, to continue.
Once you’ve chosen your preferred option for setting up your domain, click on it to continue.
This will take you to the Cart screen where you’ll select your preferred hosting term.

Bluehost offers 3 hosting durations: 1-month, 1-year, and 3-year plan.
The 1-year plan is the most popular and budget-friendly, while the 3-year plan is the best price (in the long run). That said, select the hosting term you want.
Hopefully, before it elapses, your website will have become profitable enough to pay for a fresh term.
Next, delete other sections you don’t need now from the cart.
Once you’re done, the discounted cost will automatically reflect in the Order Summary column on the right.
Next, click on Continue to Checkout to bring up the Checkout screen.
There are 4 sections on this page:
The first is Contact Information.

Provide your accurate personal data, including the email address to which your receipt will be sent.
Also, make sure to fill in the Postal Code field correctly.
You’ll find your state’s postal code in the Nigeria Post Codes and Zip Codes Official list page.
Next, are the 2nd, 3rd, and 4th areas: Account Information, Billing Information, and Billing Address.

Under Account information, create and confirm a strong password that you’ll use to access your hosting account later.
Next, under Billing Information, enter your Credit Card or PayPal details – whichever one you want to use.
Then, under Billing Address, Bluehost automatically uses the same details in the Account Information section.
Finally, click the blue Submit Payment button to process your payment.
Once Bluehost confirms your payment, they will initiate the process for your hosting account.
First, you’ll get a congratulatory screen showing your order was successful.
They will also send you an email (like the one below) confirming your payment.

Bluehost will start setting up the account for you. This may take a few minutes.
When they’re done, you’ll get a login screen asking you to enter the password you created earlier.
Once you log in, you’ll be brought to the next screen with a few themes Bluehost has selected.
However, since I’ll be walking you through the process, go ahead and click on skip this step at the bottom of the page.
This will immediately initiate the installation of WordPress.
Step 3: Install the Latest WordPress Version
Many beginners make the costly mistake of starting their website on WordPress.com, a free web hosting service provider.
It is often mixed up with the original WordPress (or WordPress.org), the CMS. But there is a big difference between both of them.
If you are serious about doing business online, then you want to set up your website using “self-hosted WordPress”.

Thankfully, Bluehost has made installing WordPress even easier.
Before now, you had to go to your hosting account to activate the process of installing WordPress, but not anymore.
They now automatically install the most current WordPress version for you.
Every version is always an improvement over the previous one, and more beginner-friendly.
Once WordPress is set up, click on the blue Start Building button.
This will take you to the backend of your WordPress dashboard where you will build and manage your site.
First, let’s get acquainted with the WordPress dashboard (or admin area).
The bulk of your work will be done using the different tabs on the left area (or sidebar) in your admin area.

▸ Posts – is for writing and publishing content called posts for the blog section of your website.
▸ Media – is for adding images and videos to your content.
▸ Pages – is for creating static, usually one-off content called pages like the About page, Disclaimer page, etc.
▸ Comments – is for keeping an eye on your users’ comments on your blog posts.
▸ Appearance – is for setting up the look and feel of your website.
▸ Plugins – is for installing plugins and small apps to add more features and functionality to your website.
▸ Users – is where you can permit others to access the backend of your website.
▸ Settings – is where you can adjust some basic settings on your website.
At this juncture, let’s make some basic changes to your site’s settings to lay the foundation of your website’s customization.
Here are 6 basic settings to tweak right away:
▪ Change Your Site Title and Tagline
Your site title and tagline play a key role in your SEO rankings. They are one of the first things your visitors will see.
They are sometimes visibly placed at the top of every page in many WordPress themes.
So, you want to optimize them as much as you can.
WordPress automatically displays your site title as “Just another WordPress site” – a kind of “just another face in the crowd.”
To change this, click on Settings ≫ General. On this screen, type your site title, i.e. your website’s name, and tagline, i.e. a short description of what your site is about, in the respective fields.

The tagline is optional. Most WordPress SEO plugins will replace it with more advanced SEO.
Once you’re done, scroll down to Save Changes, to save your new settings.
Depending on your theme, you can also change your site title and tagline through Appearance ≫ Customize in your dashboard using the WordPress theme customizer.
▪ Set Up Your Website Permalink Structure
The permalink structure is the permanent URL (Uniform Resource Locator) that defines your website’s address.
By extension, it determines the format of your pages’ addresses.
It also plays an important role in how search engines and users find your website and individual pages.
So, choose a permalink structure that is simple, short, and readable.
Thankfully, WordPress automatically chooses the Post name option. It is the most SEO-friendly URL structure.
However, depending on the type of website you want to build, you can still change this.
For example, a news site may want to date in their permalinks.
To set your URL structure, click Settings ≫ Permalinks on the left sidebar, and select your preferred option.

▪ Adjust Your Comments Settings
WordPress allows you to receive comments and feedback from your readers when they interact with your blog posts.
That said, you’ll want to vet all comments and eliminate spam.
To set up the comments section, go to Settings ≫ Discussion, and scroll down to the Before a comment appears section.
Go ahead and check the Comment must be manually approved box.

Once you’re done, scroll down and click Save Changes, to save your changes.
▪ Set Up Your New Homepage (aka Static Front Page)
WordPress automatically displays your blog posts on the front page of your website.
You may, however, want to create a new homepage to list your posts.
To do so, create two pages with the ‘Pages’ menu in your admin area. One for your new homepage, and the other for your blog posts page.
Now, to set up your new homepage, click on Settings ≫ Reading. On the Reading Settings screen, check the small circle next to A static page under Your homepage displays.

Once you’re done, click Save Changes at the bottom of the page to save your new settings.
▪ Set Up Your Navigation Menus
Setting up your navigation menus helps visitors easily skim your posts and pages.
WordPress has a robust built-in navigation menu system used by WordPress themes to display menus.
To set up a menu, go to Appearance ≫ Menus. At the top of the Menus screen, click on the drop down in the Select a menu to edit field; or tap Create a new menu to create a new one.
When you select a menu, it will appear in the Menu Name field under Menu structure.
But if you want to create a new menu, once you click the tab, you’ll need to type the new name in the Menu Name field, and then, click the blue Save Menu to save it.

Next, under Pages in the left column, check the boxes of the pages or posts you want to include in your newly created or selected menu. Then click Add to Menu.
Note: Your pages and posts must be live for it to be listed here.
The pages you check will then appear under your menu name. You can rearrange them in whatever order you want.
Then under Menu Settings, choose a display location where you want the menu displayed.
Lastly, click on the blue Save Menu at the bottom right-hand corner of the page to store these new settings.
▪ Set Up Your Website’s Visibility
WordPress allows you to hide your site from search engines and public view during the building process.
So the Discourage search engines from indexing this site box comes checked by default.
To view this, go to Settings ≫ Reading. Then scroll down to Search Engine Visibility and you’ll see the Discourage search engines from indexing this site box already checked.

Leave it checked throughout the setup stage.
However, some beginners forget to uncheck this option when they’re done.
So, come back here before you go online and uncheck it, so that search engines can find, index, and serve your website (and content) to users.
Then click on the blue Save Changes button to save your new settings.
The next step is choosing a WordPress theme for your website.
Step 4: Choose a Lovely Theme as Your Site Design
You‘re now about to begin the building proper. And it starts with choosing a nice WordPress theme for your website.
Every new WordPress version comes with a new default theme.
It usually has a minimalist design so that content creators can change the look and feel of their site to what they want.

Your website is now online and functioning with the new default theme.
To view your live site, click your domain name at the top-left corner of your WordPress dashboard.
While you can improve the default theme, you can only do so much.
I recommend selecting an already-designed theme specially made for your niche that you can easily tweak to your taste.
So, let’s pick a gorgeous theme that will make your site stand out.
Again, your theme will provide the springboard for your website’s custom design and functionality.
More importantly, you want to select a theme that is mobile-friendly.
Because statistics show that most of your users will access your website via smartphones.
Now, there are two options for choosing a theme in WordPress.
The first option is to select a free WordPress theme.
There are currently about 12,000 free themes in the official WordPress.org theme directory that you can choose from.

To browse free themes, simply login to your WordPress dashboard. Then, in the left sidebar, click Appearance ≫ Themes.
You’ll see the few themes that WordPress has already handpicked for you.

To search for more themes in the official theme directory, click Add New at the top of the Themes screen, or the in the sidebar.
You can filter them using the Popular, Latest, Commercial, Community, and Block Themes icons. You can also use the advanced Feature filters to narrow down your search.

Clicking the Feature Filter button will bring you to a new page with more options under 3 categories: Layout, Features, and Subject.

Now, tick the check boxes in each column that suit your style, and then click on Apply Filters to bring all the themes that match your search.
For example, if you‘re setting up a website for your photography business, simply enable the appropriate checkbox under Subject and the check boxes of the features and layouts you want your theme to have.

Next, click Apply Filters to bring up dozens of themes that match your specifications.

Take a look at the themes that catch your eye.
Simply move your mouse over each to bring up the preview button. Then, click on it to sample the design.
If you have a particular theme in mind, simply type the name into the Search themes bar on the top right-hand corner of your screen.
I recommend you go for something simple and lightweight, to improve user interaction with your website.
You should look at my post on how to choose a good WordPress theme. It is loaded with useful information on this topic.
The second option for choosing a WordPress theme is to search for premium themes on their developer’s websites or popular marketplaces like StudioPress, cssigniter, ThemeForest, MyThemeShop, and Envato, among others.
You can easily locate some third-party sites from the WordPress theme directory.
Simply click on Commercial Themes at the top right-hand corner of WordPress.org’s homepage.
The price bracket for paid themes is between $20 and $75 (i.e. about ₦20,000 and ₦75,000), usually a one-time fee. Some could cost more.
To use any premium theme on your site, you’ll need to download it from the website where you made the purchase and upload it on your dashboard.
Some people prefer paid themes to free ones mainly because they offer more features and 24/7 customer support.
Once you make your choice – whether free or paid, go ahead and install it, so that you can begin to tweak it to your taste.
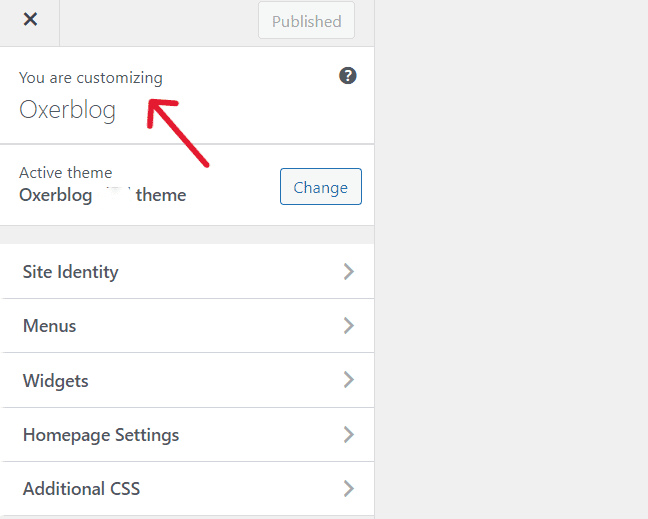
▪ Customize your newly-installed theme.
While you can use a good theme right out of the box, you want to tweak and customize it to match your brand.
WordPress allows some basic level of customization on any theme using the built-in tool called the theme customizer.
To access it, click on Appearance ≫ Customize on the left sidebar of your dashboard.

This will bring up the theme customizer interface. Here, you can make the changes you want to your theme settings with a live preview of the theme before you activate it.
You can modify a lot of things such as your homepage, site’s typography, colors, etc.
Once you’re done, click Publish at the top of your customizer to effect the changes.
There is, however, a third option if you want to create a fully custom WordPress theme for your site. You’ll need theme builders like SeedProd. And you don’t even have to learn or write any code.
Once you choose your theme, the next thing is to add content to your website.
Step 5: Publish the Basic Pages Your Site Needs
In WordPress, you can create content in two ways: pages and posts.
People often mix them up because they’re very similar in appearance. But they’re very different and they have specific uses.
Pages are usually one-off, unchanging content that can remain relevant throughout the lifetime of your website.
While posts are constantly evolving content published in a blog (hence the tag ‘blog posts’).
Again, take note: Pages can only be created with the ‘Pages’ menu in the WordPress dashboard, and posts with the ‘Posts’ menu.
In the past, a typical website used to have only pages. That’s why they’re called ‘website pages’ (or ‘web pages’).
Nowadays, most websites have a blog section − which is what I recommend.
This will help your website’s search engine rankings and traffic. I’ll talk more about this in the next step.
Let’s now see some basic pages your website needs, and a few other great ones it should have.
Basic pages your website needs
1. Home Page

Your homepage is the front (or main) page of your website, similar to the front page of a newspaper or magazine.
This is the first page that a sizeable number of your users would see when your site loads on their screen.
So your home page introduces your website to visitors by giving an overview of what they will find.
And within seconds, most visitors decide whether to stay or leave your site based on what they think about your homepage.
Chances for second impression are very slim, especially online.
So, you’ll want to design a user-friendly, visual homepage that instantly captures and engages visitors’ attention as soon as they land on it.
Unlike newspapers and magazines, your homepage should be simple, with links to areas with important information about your business and product.
You can use the lead image for your brand, and add a call-to-action (CTA) button at strategic points on your homepage.
Also, make it easy for your users to get to your homepage from other pages (aka sub-pages), by placing your ‘home’ link on each page on your website.
The tip is to use a few words on your homepage and make every word count.
Note: When evaluating your site quality, Google visits your homepage to understand your website.
2. About Page

Potential customers and search engines also visit your ‘About’ page to know who owns the website.
So, you want to create an ‘About’ page that clearly states who’s responsible for your website and business.
Is it owned by an individual or a group of individuals? Who are they, and what are their various responsibilities?
Your ‘About’ page allows users to get acquainted with the brains behind your website, products (or services), and brand.
And once people like what they see, it helps them build trust and encourages them to explore our site.
And once they’re fascinated by it, they want to buy your products, use your services, and become regular customers.
Your About page should include a profile of your company, projections for the future, and genuine testimonials from satisfied customers.
3. Contact Page

Your Contact page is another essential page for your business website.
Your users may want to contact you for various reasons, from reporting an issue to specific inquiries about your products and services.
Also, like your homepage and About page, Google checks out this page to size up your website.
Your Contact form is one of the many ways visitors and customers can easily reach you.
Other channels include emails, telephone numbers, physical addresses (if you have brick-and-mortar offices/shops), live chat, map location, etc.
Providing multiple contact information channels on your website is a good business strategy.
It can help increase your company’s profile, especially if your response is prompt on all these channels.
Your contact information can also include the names of individuals who can address specific issues.
Finally, your contact form should include fields for only the information you need, to keep it as simple as possible.
For example, don’t ask for customers’ number(s) if you won’t respond by phone.
4. Product or Service Page

Every website offering products or services needs a product or service page.
This is one of the pages users researching your brand, products or services will visit on your site.
A page dedicated to this purpose allows you to showcase your products or services, and give all the information prospective customers need.
It is better to create a unique page for each product or service (if you’re offering more than one).
This will give you ample space to explain the features and benefits of each of them in more detail. Because the sale is in the details.
You’ll want to also list what makes you different from the competition.
IMPORTANT: This page (or pages) should have CTA buttons in visible places to help users easily decide a purchase.
5. Privacy Policy Page

A privacy policy is a page disclosing the modalities for gathering, storing, and securing customers’ personal data on your website.
This policy should also indicate if you’ll send users’ data to third-party websites, and why?
All over the world, people are very reluctant to give out their personal details because of the level of fraud on the internet, and unsolicited mail that they are bombarded with.
A Privacy Policy page will show customers you’re transparent and trustworthy.
Moreover, your customer base will spread across different regions of the world.
So, it is compulsory to have a clearly stated privacy policy on your website.
For example, in Europe, even if you don’t live there, once you have customers from there patronizing your website, the General Data Protection Regulation (GDPR) says you have to comply, or you will be fined.
Some third-party websites like advertising networks and analytics websites won’t even work with you if you don’t have one.
6. Terms and Conditions Page

The Terms and Conditions (aka Terms of Service or Terms of Use) page is where you’ll state clearly the rules governing the use of your website and products, to protect your website, company, and even customers.
Though users hardly read it, it is a page you should publish, just in case.
In business, you deal with all manner of people, so don’t take anything for granted.
This page can protect your rights and limit liability, should a customer sue you for whatever reason.
Attorneys will advise you to publish one on your site.
It is better to engage the services of a lawyer to draft it because of the legal gibberish in it.
Alternatively, you can easily generate a Terms and Conditions template online on Shopify, and customize it to fit your setup.
7. Return/Refund Page

In this part of the world, returns/refunds are not popular, but they’re a big part of doing business online.
Even if your focus is local, again, some of your customers will definitely be coming from other regions of the globe.
So, to conduct your business online successfully, you need to have a well-written return/refund policy in place.
It is a great way to distinguish your company from your competitors’.
It can help you quickly build credibility and trust, boost sales, generate new profits, and increase customer loyalty and retention.
Having a clear return policy says 3 things to people:
First, it says to people your business is customer-friendly.
Second, creating one speaks volumes to customers about your confidence in the quality of your products or services.
Third, the content itself can attract some new customers, and keep old ones, once there’s an assurance that they can return goods, and either ask for a replacement or full refund if they’re dissatisfied with your products.
Your return policy should clearly state the time for returns, what goods can be returned on what conditions, and how long it will take to get a refund or replace the items.
This can turn satisfied customers into your company’s mouthpieces on social media and among friends and family.
8. ‘Page Not Found’ Page

Every website is bound to generate a 404 error when visitors request a page that doesn’t exist, for one reason or another.
It could be that they typed an incorrect URL, the page has been deleted, you have changed the address, or it doesn’t even exist.
Any of these scenarios will produce a page not found on the user’s screen.
However, when it becomes too frequent, it can lead to poor user experience, increased bounce rate, and reduced dwell time on your site.
This can cause your rankings to dip.
To avoid this, you’ll want to create a special ‘page not found’ page to redirect your users to either your homepage or a page where they can find other useful content, instead of leaving your site.
Pages that are great to have:
1. FAQ (Frequently Asked Questions) Page

Many of the questions that customers ask are virtually the same.
Rather than replying to these repetitive questions via emails, etc. over and over again, you should consider creating a FAQ page where you can provide these answers.
So, users can (and do) check this page to find answers similar to their questions.
Your answers should be clear, concise, sincere, and prompting.
After reading them, visitors should want to take the next step, whatever you’ve asked them to do.
As more common questions come in, you want to add them to your FAQs. That way, you’ll save time and resources answering similar questions.
So, provide adequate information about your brand and products on this page and links to where your prospects can easily find solutions on your website.
Make sure your FAQ page is scannable and easy to find on your site.
For instance, you can conspicuously link it from the pages a visitor is likely to view first, like your homepage and Contact page.
As you get more queries over time, you can create multiple FAQ pages and have a specific page for your products or services, one for your company, and another for your niche.
2. Testimonial Page

A testimonial page is another great page to add to your website. Because it is a collection of customers’ first-hand experience of your products or services.
As people use your products or services, ensure to ask for their testimonials.
Aside from the few you should add to your About page, Contact page, and other important places, it makes good business sense to dedicate a page to customer testimonials.
These opinions and personal (re)commendations are powerful, informative, and persuasive to potential customers researching your products or services when they are genuine.
Online, people’s buying decisions are greatly influenced by testimonials. So they will look at this page to see what others say about your brand.
Because people trust what other users write about a product or service.
So, a customer testimonial page is a huge marketing and sales asset that can easily sway prospects into becoming new customers.
Testimonials can also help your search engine rankings.
For instance, Google relies more on reputable independent sources to measure your reputation than what you say about your company.
A testimonial page, therefore, is an effective word-of-mouth buzz that can build your reputation with both people and search engines.
Remember to add commitment fields to this page to make it easy for your prospects to initiate or even wrap up a purchase.
3. Shipping Policy Page

If you are offering your products on your website, you should write a clear shipping policy page.
It will make your job easier, and show your customers and prospects that your company is very organized.
A shipping policy page will save you from unnecessary customer inquiries before and after shipping, once you clearly spell out how you operate.
Remember to include important details like your shipping options, pricing, delivery time, market coverage, etc.
Unlike a privacy policy, a shipping policy isn’t required by law. But it’s a recommended best practice.
That being said, you don’t want to promise what you can’t deliver. You won’t want to raise people’s expectations and dash them.
It will only raise several customer service issues that can ruin your reputation and, eventually, your business.
So, from the get-go, set clear and realistic expectations that can help you build trust with your audience.
You should also have links to your return/refund, testimonial, and FAQ pages visibly placed on this page.
You can also include a section on this page specifically for shipping policy FAQs with answers to common questions about your shipping policy.
You can find standard shipping policy templates online that you can choose from and customize according to your needs.
You can also generate and customize a free Shipping Policy on Termly.
Now you know some important pages your website will need, let’s create your first page.
Create your first page
Again, you’ll be using only the ‘Pages’ menu on the left sidebar to write all your pages.
To launch the page editor screen, click on Pages ≫ Add New Page (in the left-sidebar or at the top of your screen).

On the page editor screen, you can start with any important pages.
Go ahead and give the page a title, say Contact Us.

If you have some content ready, you can add it in the text editor beneath your title.
The default WordPress editor comes with a unique feature called blocks.
Click the blue Toggler block inserter (+) at the top of your edit screen or the black Add block (+) sign on the right side, to bring it up.

There are more than 50 different types, right out of the box.
You can use them to create beautiful content layouts for each element of your content – text, images, videos, links, galleries, etc.
So, each item on your page can have a unique block.
You can also add more blocks by simply installing and activating WordPress plugins for the features your site needs.
For our example, you can use the WPForms plugin to create your Contact form.
Then search for the WPForms block in the editor to add your Contact form.
Once you’re done, you can preview your page before publishing it.
Simply click on the Preview tab at the top of your screen. Then, click Preview in a new tab in the drop-down menu to view your page.

Once satisfied, click the blue Publish button, and your new page will be live.
If you are not done writing, use the Save Draft tab to save your draft.
It is the same process to add other essential pages to your website.
Step 6: Add a Blog Section to Your Site
Though it isn’t mandatory, you should seriously consider creating a blog section on your website.
These days, businesses add a blog section to their website where they create helpful posts to keep their customers abreast of developments in the company.
They also want to compete for search rankings for specific keywords related to their business, products, or services.
This way, you’ll spend less on sponsored posts.
If your content ranks on page 1 of search results, it positions your website and business as a leader in your niche and promotes your brand to new customers via search engines.
Here’s why you should consider adding a blog section to your website, and the statistics are startling:
Globally, 68% of all web activity begins in search engines (BrightEdge).

In 2023, 73.7% of Nigeria’s online users used search engines as their main channel to research brands, while 38.8% used brand websites (Datareportal).

According to HubSpot, companies that blog have better marketing results.
In 2023, 26.7% of Nigeria’s internet users said brand blogs were their primary source of information when researching products and brands (Datareportal).

Business websites with active blogs have 55% more visitors, 97% more inbound links, and 434% more indexed pages than websites without any (HubSpot).
Like someone said, you want to add blog content to your business website to allow you to demonstrate your expertise on topics in your industry and to discuss your products.
This will drive search traffic to your site, keep customer attention, improve brand loyalty, generate more leads, and increase direct sales.
When you want to write your blog posts, the takeoff point is finding keywords that are relevant to your business.
Research Keywords and Phrases that You Want to Rank For
Keyword research is the foundation for creating highly engaging content that can rank and get more traffic from Organic Search.
It involves searching for words and phrases your customers enter into search engines to find content in your industry.
This helps you to focus on the most important person from the start – the customer (or user).
So, keyword research makes you think about the user, rather than think for the user when creating content.
More importantly, it helps you to crack what the user is thinking – what is the intent of their search?
You can then settle down and consistently produce content that is beneficial to users, instead of just publishing what you feel they should be reading.
Statistics show that blog posts stemming from keyword research get strong results in Search (Orbit Media Studios).
Thankfully, there are free and paid tools that you can use to easily find the actual words and phrases your users are typing into search engines like Google.
Some of these tools also allow you to snoop on your competitors, to see how you can do a better job than they’ve done.
Click on Posts >> Add New Post in your dashboard, to launch the Posts edit screen.

At first glance, it is similar to the Pages menu. But if you look at it closely, you’ll see the difference.
By default, the Posts editor screen has unique features like Categories and Tags that you won’t find on Pages.
These features all have their different uses on your posts.
To get started, type your post’s title into the Add Title field. Then move your cursor below to add content.

As you type in your content, choose whichever block you want for each element of your post, to give them a distinct layout.
You can also use the Categories and Tags options to organize your posts into sections, to improve your SEO.
You can store your content by clicking on Save Draft at the top of your screen until you’re ready to make it live.
When you’re ready to go public, click Publish to make your new post available to readers.
Step 7: Add Essential Features with Plugins
The default features that WordPress comes with only allow for basic customization.
There are other essential features that you want to add to your website from the get-go to give it the minimum functionality that every site is required to have.
For example, you need to improve your SEO, prevent spam, backup your site, and secure your website, among other things.
Luckily, these features have been coded in small software called plugins.
With these WordPress plugins, you can easily add any feature you need to your site to extend its functionality without learning codes.
So, using plugins, even a beginner can add bare-bones and advanced features to their site, and create a truly, one-of-a-kind website.
And what’s more, you don’t need any technical knowledge to properly install a plugin on your site.
So, you can use any plugin right out of the box.
There are tens of thousands of free and paid WordPress plugins for different features.
This is one of the reasons why WordPress has no competition.
For free plugins, you can browse about 60,000 in the WordPress plugin directory, and find whatever you need in minutes.
Sometimes, you have dozens of plugins for a specific feature.
For example, if you type Security in the bar and click the search icon, it will bring up dozens of security plugins.
Having said that, despite the easy access to so many plugins, you want to choose and install only the best for the specific features you need on your site.
However, knowing which plugin is the best for a particular feature can be overwhelming for beginners.
Don’t worry, I’ve got you covered.
Below is a list of must-have features that every new website needs to function at a minimum, and the best free plugins available to add each feature.
Important tip: Start with free plugins to get your website online at a minimum cost.
Your website will need:
▸ A Contact form so visitors can communicate with you easily.
WPForms is the most beginner-friendly WordPress form builder plugin on the market.
It allows you to easily create beautiful forms for contact, feedback, subscription, payment, etc. It currently has over 5 million active installs.
▸ To create a Coming Soon page, Maintenance page, Landing pages, etc.
SeedProd is the number 1 drag-and-drop builder for creating custom page designs and layouts without knowing codes. It currently has 1 million+ active installs.
▸ To track all your visitors from the start – how many they are, how they linked to your site, and their activities on your website.
MonsterInsights is the most popular Google Analytics plugin for WordPress.
It will help you easily install Google Analytics on your site, and show you all the analytics and stats that matter. It presently has 3+ million active installs.
▸ To boost your website speed and performance, to improve user experience.
WP Super Cache is one of the best free WordPress caching plugins with 2+ million active users.
▸ To improve your SEO rankings to get more relevant traffic from search engines like Google.
All in One SEO (AIOSEO) is the best WordPress SEO plugin.
It will easily improve your site ranking and increase your traffic. Currently, it has over 3 million active users.
▸ To create image galleries for your website.
Envira Gallery Lite is a powerful drag-and-drop photo gallery plugin that is responsive and easy to use.
It is highly optimized for SEO and works great with top page builders like Elementor, Beaver Builder, Divi, and others.
It presently has over 100,000 active installs.
▸ To create backups for your website just in case something goes wrong – server crashes, hacks, security breaches, etc.
UpdraftPlus is the world’s most trusted WordPress scheduled backup plugin, with 3+ million active installs.
The free version will back up your website perfectly well.
▸ To fend off spam comments from invading your site.
Akismet is the best anti-spam protection against comments and spam. It has over 5 million active users.
▸ To secure your website from hackers and other malicious attacks.
Sucuri Security is one of the best malware scanners that helps to keep your website protected. It has over 800,000 active installations.
▸ To connect with your visitors after they leave your site so that you can encourage them to visit again.
PushEngage helps you engage and retain your users after visiting to boost your traffic. Currently, they have over 10,000 active users.
▸ To set up a custom 404 error page to reduce the bounce rate of your site.
Custom 404 Pro is a popular plugin for creating a custom error page to keep visitors on your site.
It currently has over 10,000 active installs.
▸Social share buttons to encourage your readers to share your content on social media.
AddToAny enables your readers to share your content over Facebook, Twitter, WhatsApp, Pinterest, Linkedin, and many more.
They currently have over 500,000 active installations.
Other Additional Features
You may also need to:
▸ Create marketing and e-mail campaigns to get more subscribers, increase sales, and grow your business.
OptinMonster is the best popup builder and marketing plugin for generating leads and turning abandoning visitors into subscribers and customers.
Currently, they have over 1 million active users.
▸ Set up an online store to sell any kind of product.
WooCommerce is the most popular eCommerce plugin.
It is free; it makes it easy to sell physical and digital products online. It has more than 5 million active installs.
▸ Engage your visitors with live chat, and attract more leads.
HubSpot is a free plugin built for WordPress to add customizable chat widgets to your website to connect with your visitors in real-time, and manage, group, and monitor your contacts, among others.
It is easy to set up and works with any website.
▸ To fix email deliverability issues; that is, when you’re having problems with your site not sending e-mails.
WPMailSMPT is the most popular WordPress SMTP (Simple Mail Transfer Protocol) plugin for fixing email deliverability issues.
Currently, it has 3+ million active users.
▸ Set up automated workflows to connect your plugins, websites, and external apps to save time.
Uncanny Automator is the simplest and most powerful WordPress plugin for automating your website without learning code.
It presently has more than 20,000 active installs.
Step 8: Make Your Website More Prominent in Search
All your hard work will only pay off if the right people can find your content easily.
And this doesn’t just happen – your website has to feature as a top result in search engine results pages (SERPs).
For Google to rank your site among the best in your field or niche, you must be willing to go the extra mile to make your content search-friendly (based on current SEO ranking factors).
SEO ranking signals are best practices you need to follow to improve your content and page layout so they can rank high in search results.
This is when you can attract relevant users to your website, and generate more leads which, in turn, will convert into sales for your business.
Again, no website can appear and rank among the best without optimizing its content for search engines.
With that said, below are 13 basic SEO best practices that Google says, if strictly followed, could have a huge impact on your site’s user experience and performance in organic rankings.
And you should listen to Google because they have the overwhelming lion’s share of the search engine market worldwide – about 92% (Statcounter).
It is even higher in Nigeria – a whopping 99+%.
13 SEO Best Practices to Improve Your Website Rankings
1. Set Up the Simplest Permalink Structure for Your Site
Again, the permalink structure is the URL structure for your website.
This defines the address (or URL) of each page, post, and other content on your site.
So, you should set up the simplest URL structure for SEO purposes from the start and stick with it.
It isn’t something you can change at will because it affects your site’s traffic and rankings.
Thankfully, by default, WordPress uses the most search-friendly URL structure, the Post name option.
You can customize it if you like. However, choose a simple, short, and readable structure.
2. Give Each Page a Unique URL
As the content of your pages is different, so should their individual address.
This makes it easy for search engines and users to quickly understand the topic of each page.
So, make sure you give each page on your site has a unique, SEO-friendly URL that accurately describes what the page is all about.
By default, WordPress uses your page (or post) title as its URL. You’ll find the URL field for each page (or post) on the right sidebar of the edit screen.
However, you can still make it more SEO-friendly if you want to.
For example, here is the URL for the post you’re reading:

Simply click on it to bring up the pop-up where you’ll optimize your URL address.
Best practice:
✓ Create a short, descriptive, and unique URL per page, and include your target keyword for each piece of content.
3. Write a Unique Title for Each Page
A page title is the title text of a page. It is called a post title in blog posts.
A title is usually the main heading for the page as shown in the image above.
WordPress automatically uses your title as the <title> element in the HTML.
Also, search engines can use your page heading as the title link of your result if it describes the contents well.
So write quality, unique titles for your pages that can help users easily understand the contents of each page.
You can easily optimize your page title by installing a good plugin like AIOSEO.
Best practices:
✓ Make each page title concise, say about 60 characters.
✓ Write great titles that Google can display as your title links in search results.
✓ Add your target keyword for each page to its title tag.
4. Influence Your Title Links in Search Results
If your page is ranked in search results, your title link is the clickable title of your result that visitors can click on to view the page.
For example, here is how the title link of the post will look in search results.

It is different from a page title which is the title text or main heading of the page.
With that said, if it is well written, Google can use the page heading as the title link for the search result.
Title links give users a quick overview of what they can expect on a page.
A title link is probably the most important on-page SEO factor.
Because it is usually the first encounter many visitors have with your website in search results.
And it is what they use to decide whether or not to click through to the page.
So, you only have a few seconds to impress them.
Aside from your title tags, Google says it can generate title links from several other places like anchor text, on-page text, etc.

Best practice:
✓ Write exceptional text in these places so that when any is used as your title link, it can prompt visitors to click on it.
5. Influence Your Snippets in Search Results
A meta description tag is a summary of what a page is all about.
It can be a sentence or two, or a short paragraph.
It is usually placed directly below your page title.
Google says it can be used as a snippet for a particular page in search results. Snippets are usually about 160 characters.
For example, this is the meta description for this post:

You can also easily create your descriptions using a good plugin like All in One SEO (AIOSEO).
Best practices:
✓ Make sure every page has a meta description tag.
✓ Create a unique and quality meta description for each page.
✓ Your description should include all relevant information about the page.
6. Use Heading Tags to Organize Each Page’s Content
Arrange your pages’ content into main points and sub-points using heading tags.

This helps to make your content attractive and each segment easily accessible.
It also helps users to easily skim through a page and focus on the section(s) that they are interested in.
Best practices:
✓ Use a few required heading tags that make your content reader-friendly.
✓ Avoid lengthy headings.
✓ Be consistent in your heading tag sizes – h1 should be the biggest, followed by h2, etc.
7. Link Your Pages Using Internal Links

Creating internal links between your pages is crucial for a new website.
They make navigating your site and finding all your important pages easier and fun.
This increases visitors’ dwelling time on your website and improves your SEO rankings.
Best practices:
✓ Write short, reader-friendly anchor text that gives users and search engines a clear idea of the linked page.
✓ Add your main keyword (just once) to the anchor text of each internal link.
✓ Use clickable text in your links.
8. Create External Links from Your Pages to Reputable Sites

Link each of your important pages to related content on high-authority sites.
These types of links are called external links.
This will boost your website’s reputation as well-researched among users and search engines.
Best practices:
✓ Follow all the guidelines under internal links.
✓ Plus, link to credible websites only.
9. Add Original Images to Your Pages
Just like text, as much as you can, create original images for your content.
According to research, Google ranks websites with unique images higher than those with stock pictures.
Best practices:
Make sure your images are optimized for SEO.
First, reduce their file sizes so they won’t slow down your site speed.
Second, write a descriptive, keyword-rich alt text for each image, to help Google and visually-impaired users identify the image easily.
Third, resize each image to fit your theme and page layout.
10. Optimize Your Website for Mobile Users

From the building stage, pay more attention to how your site performs on mobile devices.
According to Google, more searches originate from mobile devices now than any other device.
That’s why it prioritizes mobile searches in its search rankings.
In Nigeria, 83.59% of web searches came from mobile phones in 2022 (Datareportal).

So, make sure your site is optimized for mobile users.
Best practices:
✓ Use a responsive WordPress theme for your site design.
✓ Test each page using Google’s Mobile-Friendly Test to see how well-optimized your pages are for mobile searchers.

11. Make Sure Your Website Is Very Secure

Google has said that site security is a ranking factor.
They run security tests to see how secure your site is before serving it in search results.
The number one security tool recommended for all websites is HTTPS (Hypertext Transfer Protocol Secure) encryption.
It has SSL certificates that secure your site’s connection from hackers trying to steal your users’ data when they interact with your website.
Any website’s domain bearing ‘HTTP’ without the ‘S’ isn’t secure. Search engines don’t rank such sites high.
A standard SSL certificate normally costs $60 in round numbers (i.e. about ₦60,000) per year.
Thankfully, all top WordPress hosting providers offer free SSL certificates on all their hosting plans − some for the first year only, others for life.
12. Work on Your Page Load Speed

If your website is slow, users will simply click back to Search to find a faster site.
And that will increase your bounce rate and negatively affect your rankings unless your content is unique and useful.
However, when multiple sites have similar content quality, Google uses page load time, among others, to decide which page to serve in search results.
To improve your performance, you need to optimize your images, use a WordPress caching plugin, and a CDN WordPress, among other things.
13. Create High-Quality and Useful Content
High-quality content is still king.
It remains the most important ranking factor.
All other ranking factors revolve around it.
SEO starts with creating exceptional content that thoroughly answers users’ queries. And using the best practices to give visitors the best user experience possible on your website.
So, if you do well with other ranking factors but publish poorly written content, search engines won’t rank your site.
Best practices:
✓ Write information-rich, enjoyable, and helpful content that will turn visitors into permanent users.
✓ Strategically place your main keyword across your content.
✓ Include related keywords and synonyms in your content.
✓ Use visual content like images, screenshots, diagrams, and videos to buttress your text on each page.
Should you want to learn more, I have a full article on several basic SEO best practices you should follow.
The more of these techniques you practice, the better the results you get.
Step 9: Market Your Brand to Your Specific Audience
Once you’ve got your pages in tip-top condition with basic SEO best practices, the next thing is to promote your website to your target audience as soon as you make it live.
While the majority of your traffic will come via search results, there are some visitors that you can attract to your site using other proven marketing strategies.
Moreover, you should be in touch with your loyal customer base, especially when you add new content or product to your website.
The fact is, the more traffic you attract to your website, the more likely you will grow your user base, and the greater the opportunity for you to make money online.
Below are some of the best marketing strategies you should consider and implement from the get-go to further increase your site traffic.
These are some of the methods that even established sites use, to continue to expand and maintain their reach on the web.
Thankfully, these strategies are cost-effective and easy to execute.
1. Build a Mailing Community

After SEO strategies, email marketing is arguably the second most effective way to attract more relevant users to a new site.
According to Statista, globally, email marketing return on investment (ROI) is $45 (i.e. about ₦45,000) for every $1 (i.e. about ₦1,000).
If your website has a blog section, email newsletters can be a great way to notify readers about your newly published posts.
So, start building a mailing community once you get online with a plugin like Constant Contact or Brevo.
They are tried and tested, and best of all, easy to set up.
People who like your website, and want to visit again, will most likely sign up for your email list.
2. Push Your Website on Social Media

Take advantage of the social media space to promote your website and business.
Social networks like Facebook, Instagram, Snapchat, Linkedin, etc. provide fertile ground for marketing, networking, and collaborations that can generate traffic to your site.
According to Datareportal, in 2023, 24.7% of Nigeria’s social media users used social media to view content from brands, while 24.4% used it to find inspiration for things to do or buy.

Also in 2023, social networks top the chart for online brand research (Datareportal).
84.3% of Nigeria’s online consumers said social networks were the main channels they used when researching brands online. 17% said they used micro-blogs like X (formerly Twitter).

Social media is also an effective tool for generating leads and converting them into loyal customers.
In 2023, 24.1% of Nigeria’s online consumers followed the social media accounts of brands they buy from (Datareportal).

So, create and share catchy bulleted-list posts on your products or services, including customer testimonials on different social channels.
If people like what they see, they’ll follow you and even share your post (for free) with their audience.
You should add links to your website to get more traffic, for maximum results.
Setting up accounts on popular social channels is easy and free; so is promoting your content.
However, different social channels appeal to different audiences.
So, be strategic and choose only the platform(s) that is best suited for your setup and marketing goals.
3. Engage Popular Social Influencers in Your Industry

Aside from creating accounts on social media to promote your business, you can also approach famous personalities in your niche on these platforms.
Social media influencers have built a reputation and they generate large followings of engaged people who have high regard for their views.
So, they have a huge influence on their purchasing decisions.
37.8% of Nigeria’s online consumers discovered new brands, products and services via celebrity endorsements in 2022 (Datareportal).

Influencers will accept to feature your brand, products, or services on their posts for a fee. This is known as influencer marketing.
This strategy works better when you offer discounts or bonuses to their followers. This can entice them to click through to your website.
4. Participate Actively on Relevant Online Forums

Niche-based online discussion forums allow you to connect directly with the right audience.
So, become an active and valued member of popular related forums by answering people’s questions and posting rich snippets from your original content.
These forums also give you rich insights into what people search for in your niche.
You can create and share helpful and relevant content that users need, to raise awareness about your website.
Once people notice your quality, they will want to visit your website.
In 2023, 10.2% of social media users in Nigeria used forums and message boards to find information about brands and products (Datareportal).

So, you should promote your brand and website on these platforms to attract more visitors.
5. Use Paid Advertising

It makes sense to look at the statistics to see where customers locate brands online.
In 2023, Nigeria’s internet users discovered brands, products, and services through ads on TV, billboards/posters, public transport, social media, mobile/tablet apps, magazines/newspapers, radio, and ads before online videos (Datareportal).

So I recommend you use paid ads through different channels to get your website, products, or services in front of more eyes.
Again, each medium has their own unique user base, so you want to advertise only on platforms that have a sizeable concentration of your target audience.
There are affordable creatives online who can help you design effective advertising campaigns to engage your specific audience(s) and produce good ROI (return on investment).
Consider creating different ad formats and sizes and test them to see which works best for you.
Include your website’s address in all your campaigns.
You can evaluate your advertising performance by setting simple analytics on your site asking visitors how they found you.
6. Create a Free Google Business Profile

Again, Google is the largest search engine in the world, with about 92% of the market share –it is 99% in Nigeria.
So most searches for products, services, and brands, including business locations, are done on Google.
For a long time, they’ve offered free listings known as Google Business Profile (formerly Google My Business) to help people easily find local businesses nearby.
All you need to get listed are details and photos of your business, including your address, products and services, phone number, open hours, and website URL.
You can also add crucial information such as customer reviews, special offers, promotions, and giveaways, to help your site easily stand out.
Your company can show up in Google Search, Google Maps, and Google Shopping when people search for businesses like yours in your area.
Having said that, this opportunity will mostly benefit businesses that have physical contact with customers.
Free listing opportunities are available on other global online directories like Bing Places and Facebook Marketplace, among other places.
So, it is a big opportunity you don’t want to miss.
Frequently Asked Questions (FAQs)
People ask lots of questions about how to create a website in Nigeria. Below are some of these frequently asked questions that you may find useful.
What is a website?
A website is essentially any site on the web.
A typical website is a collection of interlinked static web pages (and related content) sharing a common domain name.
These web pages can be viewed on the internet using an enabled device like a smartphone, iPad, or computer.
You can create a website to put out information about yourself, your business, your family, yourorganization, or any other topic you want in the public domain.
A website’s content can be published in different formats such as text, images, videos, audio, infographics, and animation.
There are all kinds of websites, and every website is indeed unique. However, they can be grouped into certain categories or types, based on their features and purpose.
For instance, Facebook, Twitter, Instagram, TikTok, and WhatsApp are unique websites but are all grouped as social media sites.
Amazon, Taobao, Tmall, eBay, Alibaba, and Jumia are online marketplace websites but each has a different MO (mode of operation), niche, userbase, etc.
So, while they can be grouped based on features and purpose, websites can be unique based on MO.
Just know this: You can make a website for any purpose.
What is the difference between a website and a blog?
A website is where you publish never-changing, one-off content that provides information about yourself or your company.
Websites consist mainly of webpages written in a more formal tone and can remain relevant throughout the life of the website.
While you can create a website with only web pages, these days, websites are built with a blog section.
On the other hand, a blog is a website where you publish new and regularly updated content that provides information, help, and/or instructions about a particular topic (or topics).
Blogs consist of dynamic content called blog posts written in an informal, conversational style.
These posts allow for interactions through a built-in comments section.
However, a blog can have a few important web pages like the About page, Homepage, Contact page, etc.
In the early days, blogging was about keeping a personal diary where people recorded and shared their day-to-day runs and life stories.
Over time, it has become a popular way of sharing knowledge and earning income.
How can I create a website in Nigeria?
There is only one World Wide Web. So, creating a website in Nigeria requires the same startup tools and setup process, as in any other part of the world.
To create your website, you’ll need the following tools:
✓ A unique domain name – to differentiate and access your website online
✓ A reliable web host like Bluehost – to house your site on the web
✓ A powerful content management system (CMS) like WordPress – to build your website
✓ A beautiful WordPress theme – to beautify your site
✓ Essential plugins – to add the features you need on your website
You can then set up your website with these 8 easy steps:
➀ Choose a domain name
➁ Select a web host
➂ Install the latest WordPress version
➃ Pick a theme as your website’s design
➄ Add content to your site
➅ Add essential features using plugins
➆ Make your website search-friendly
➇ Market your brand to your target audience
In this post, I have written comprehensively about how to make a website in Nigeria. Please, scroll up to see the details.
With this detailed guide, you can easily create your own website by yourself.
How can I create a website for free in Nigeria?
Many hosting companies allow people to create a free website.
However, creating a free site as your business website isn’t a good idea.
First, your site’s domain name which is supposed to represent, and project your company or brand will be an appendage of the free hosting provider.
For example, if you host your website for free on WordPress.com, your domain will be something like this:
www.yourdomainname.wordpress.com.
Apart from that your domain name will be too long, it is not businesslike.
It makes people view your brand, product, or service as inefficient and cheap. That’s why you, the owner, cannot invest in it.
And if you cannot invest in your business for something as little as web hosting and a custom domain, why should anybody else?
Second, you cannot build a unique business website on a free platform. Because these free hosting platforms only allow very little space and freedom.
For instance, you cannot use any design on your site apart from the limited few they have installed.
You cannot download and install all the features you need for your website to function optimally.
Also, you cannot add all the images you’ll need to enrich your content.
To cap it all, you are given limited space for your content. WordPress.com, for example, provides 1GB only.
But for as little as $2.95 (i.e. about ₦3,000) a month on Bluehost, you will have complete control and enough space to launch a truly unique website for your business.
Is WordPress.org good for beginners?
The answer is a resounding yes! The WordPress software is designed with both beginners and experts in mind.
Its core is simple and predictable so that beginners can easily get started.
At the same time, it offers robust and flexible features so that web designers can customize it in uniquely different ways.
And WordPress continues to evolve, so non-techy guys can use it out of the box to create a fully- functional website and share their content freely.
What is the difference between WordPress.org vs WordPress.com?
WordPress.com is a web hosting service, while WordPress.org a content management system (CMS).
However, neither of them can function alone.
A CMS needs to be installed on a web hosting platform to create and host a website online.
Like WordPress.com, hundreds of web hosts also enable people to build websites with WordPress.
Already started a free website, how can I switch?
Moving your free site to a more flexible web host can help you flourish better and make serious money.
Most reliable hosting companies offer free migration services to help free sites easily transfer all their data securely and correctly.
Simply choose a new web host, and you’ll find the migration feature to help you move all your content with just a few clicks.
It is that easy.
How can I make money from my website?
There are countless ways to make money legitimately from your website.
I have taken the time to write 55 proven ways to make money in Nigeria today.
It is the most detailed post ever on how to make money online in Nigeria.
I added reliable data from authoritative sources to show the trends and projections by experts about the increasing opportunities to make money using these various methods.
I also included examples of successful Nigerian websites and Nigerians thriving online using these ways.
To further inspire you, I pointed out a few foreign examples also.
You’ll need to create a website for most of these methods. You’ll need to also invest time, hard work, and money to build a successful website.
Most importantly, you’ll need to patiently wait for the results. Success won’t come overnight, but it will surely come.
Just make sure you’re doing things correctly from the get-go.
You need to know this: So many people are making six-figure incomes legitimately from their work online.
As we say in Nigeria, these people don’t have two heads; if they can, you too can. And you should do something about it now!
Stop thinking about ‘what can you do today’. Let’s rearrange those words: ‘Do what you can today’.
I did. That’s you’re reading my content now.
How much can I build a website in Nigeria?
The cost of building a site varies greatly, from website to website.
So, it depends on several factors such as the functionality it needs to run smoothly, the quality of the tools you are using, the size of your budget, and who is building it.
I recommend you use quality tools to build your site from the get-go. Because it is cost-effective in the long run.
The tools you need to build a particular type of website are the same anywhere in the world, so websites cost about the same price everywhere.
To help you, I have a detailed guide on how much it currently costs to build a new website.
In the article, I grouped all websites into four main categories based on the features they need to function.
For example, the features a beginner website requires to function well are different from what a business website will need, or what an online store should have.
Having said that, the final cost of your website is your call to make.
Again, use quality tools and features to build your website from the get-go.
For example, if you host your site with a cheap hosting service that nods off every now and then, that will cost you more in every way – search rankings, traffic, trust, money, and even your reputation.
So, the tools and services you use to make your website will affect its overall efficiency and success.
So, as much as you can, use quality stuff.
One way to know quality is to read customer reviews of a product or service about users’ experiences.
Also, find out how many active users it has.
How much is web hosting in Nigeria?
Different web hosts offer various types of hosting plans and pricing.
On average, Shared hosting and WordPress hosting start from $1.99 (i.e. about ₦2,000) to $13.95 (i.e. about ₦14,000) a month.
VPS (Virtual Private Server) hosting sells for between $2.99 (i.e. about ₦3,000) and $80 (i.e. about ₦80,000) monthly.
Dedicated hosting costs a little much more – from $79.99 (i.e. approximately ₦80,000) to $279 (i.e. about ₦279,000) per month.
Cloud hosting costs $4.95 (i.e. about ₦5,000) to $29.99 (i.e. about ₦30,000) a month.
Managed hosting starts at $25 (i.e. about ₦25,000).
ECommerce hosting starts from $3.99 (i.e. about ₦4,000) to over $300 (i.e. above ₦300,000) monthly.
These prices are the current rates in the market.
Note that all the above figures are discounted prices for new purchases, and are billed per term. At the expiration of the first term, prices will renew at regular rates.
Again, I recommend hosting your website with tested and reliable web hosting companies.
As a matter of fact, web hosting can have a huge impact on your search engine rankings, site traffic, and earnings.
Below is a list of some of top web hosting available, and the specific prices of different hosting types they offer (in round figures):
▸Shared hosting: $2.95 – $13.95 (i.e. about ₦3,000 – ₦14,000)/month
▸WordPress hosting: $2.95 – $13.95 (i.e. about ₦3,000 – ₦14,000 )/month
▸Ecommerce: $15.95 – $32.95 (i.e. about ₦16,000 – ₦33,000)/month
▸VPS hosting: $18.99 – $59.99 (i.e. about ₦19,000 – ₦60,000)/month
▸Dedicated hosting: $79.99 – $119.99 (i.e. about ₦80,000 – ₦120,000)/month
▸WordPress hosting: $1.99 – $27.50 (i.e. about ₦2,000 – ₦27,500)/month
▸Shared hosting: $1.99 – $3.95 (i.e. about ₦2,000 – ₦4,000)/month
▸VPS hosting: $10 – $80 (i.e. about ₦10,000 – ₦80,000)/month
▸Dedicated hosting: $149 – $279 (i.e. about ₦150,000 – ₦279,000)/month
▸Cloud hosting: starting from $0.0075 (i.e. about ₦8) an hour
▸Shared hosting: $1.99 – $4.99 (i.e. about ₦2,000 – ₦5,000)/month
▸Cloud hosting: $9.99 – $29.99 (i.e. about ₦10,000 – ₦30,000)/month
▸VPS hosting: $2.99 – $77.99 (i.e. about ₦3,000 – ₦78,000)/month
▸WordPress hosting: $1.99 – $11.59 (i.e. about ₦2,000 – ₦12,000)/month
▸WooCommerce: $3.99 – $23.99 (i.e. about ₦4,000 – ₦24,000)/month
▸Web hosting: $3.99 – $10.69 (i.e. about ₦4,000 – ₦11,000)/month
▸WordPress hosting: $3.99 – $10.69 (i.e. about ₦4,000 – ₦11,000)/month
▸Cloud hosting: $100 – $400 (i.e. about ₦100,000 – ₦400,000)/month
▸WooCommerce : $3.99 – $10.69 (i.e. about ₦4,000 – ₦11,000)/month
▸Shared hosting: $2.75 – $5.25 (i.e. about ₦3,000 – ₦5,500)/month
▸Cloud hosting: $4.95 – $9.95 (i.e. about ₦5,000 – ₦10,000)/month
▸WordPress hosting: $5.95 – $9.95 (i.e. about ₦6,000 – ₦10,000)/month
▸VPS hosting: $23.95 – $59.95 (i.e. about ₦24,000 – ₦60,000)/month
▸Dedicated hosting: $89.98 – $139.99 (i.e. about ₦90,000 – ₦140,000)/month
▸Managed hosting: $25 – $250 (i.e. about ₦25,000 – ₦250,000)/month
▸Ecommerce solutions: $63 – above $300 (i.e. about ₦63,000 – above ₦300,000)/month
Can I build a website without hosting?
No, you can’t.
A website builder like WordPress has to be downloaded and installed on a server – either a local host (i.e. your personal computer) or a web host (i.e. online servers) before you can use it to create a website.
So, whether you are building privately or publicly, you need hosting.
In other words, you can build a website without a domain name, but not without hosting. For example, Bluehost allows you to continue building without a domain.
Having said that, you need a domain name and web hosting to go online with your website.
Conclusion
Conducting business online has been mainstreamed in Nigeria.
So, creating a website is a must today.
With this guide, you can build a website and make it live in less than 30 minutes.
However, you need to optimize your site for Search and market your brand to your target audience.
And you never can tell, you might just be the next big thing online.
There you have it – how to create a website in Nigeria (in 9 easy steps).
I hope this post has inspired you, and was helpful in learning how to create a website in Nigeria, and how to get it to rank in Google.
Please feel free to consult my article titled 27 basic SEO best practices recommended by Google, should you want to learn more.
You may also want to see my comprehensive article on 55 sure ways to make money online in Nigeria. There is nothing else quite like it.
If you like this article, please help me spread the word among your friends. Thank you!